November 24, 2010

Reduce your stress at Thanksgiving...

Years ago I started making about ½ to ¾ of our Thanksgiving meal a day or two ahead of time. Having veggies and or even the entire dish its self prepped and ready to go is the key!

We were living in a house that had a small kitchen and cooking a big meal in there could be quite stressful. Having small children and a husband at home chanting "is it turkey time yet" did not help the matter. Not only did cooking ahead save me on time on the big day but I also found that I wasn't stressed out and better yet... my kitchen wasn't the ominous towering inferno of dirty dishes. I had time to enjoy my friends and family and pulled off a huge dinner and made it all look near effortless -how? Simply because I was organized.

Ways to be organized for Thanksgiving Dinner

♥ Start making your plan at least 2 weeks ahead of time. Plan everything from beverages, to dinner napkins, table linens and of course the food being served.

♥ I find that grocery shopping at least 3 days ahead of time to be the key.

♥ Be sure to have plenty of those inexpensive plastic food storage containers on hand (Glad and Ziploc are the best). They work great for storing prepped veggies, storing leftovers and sending leftover desserts home with guests.

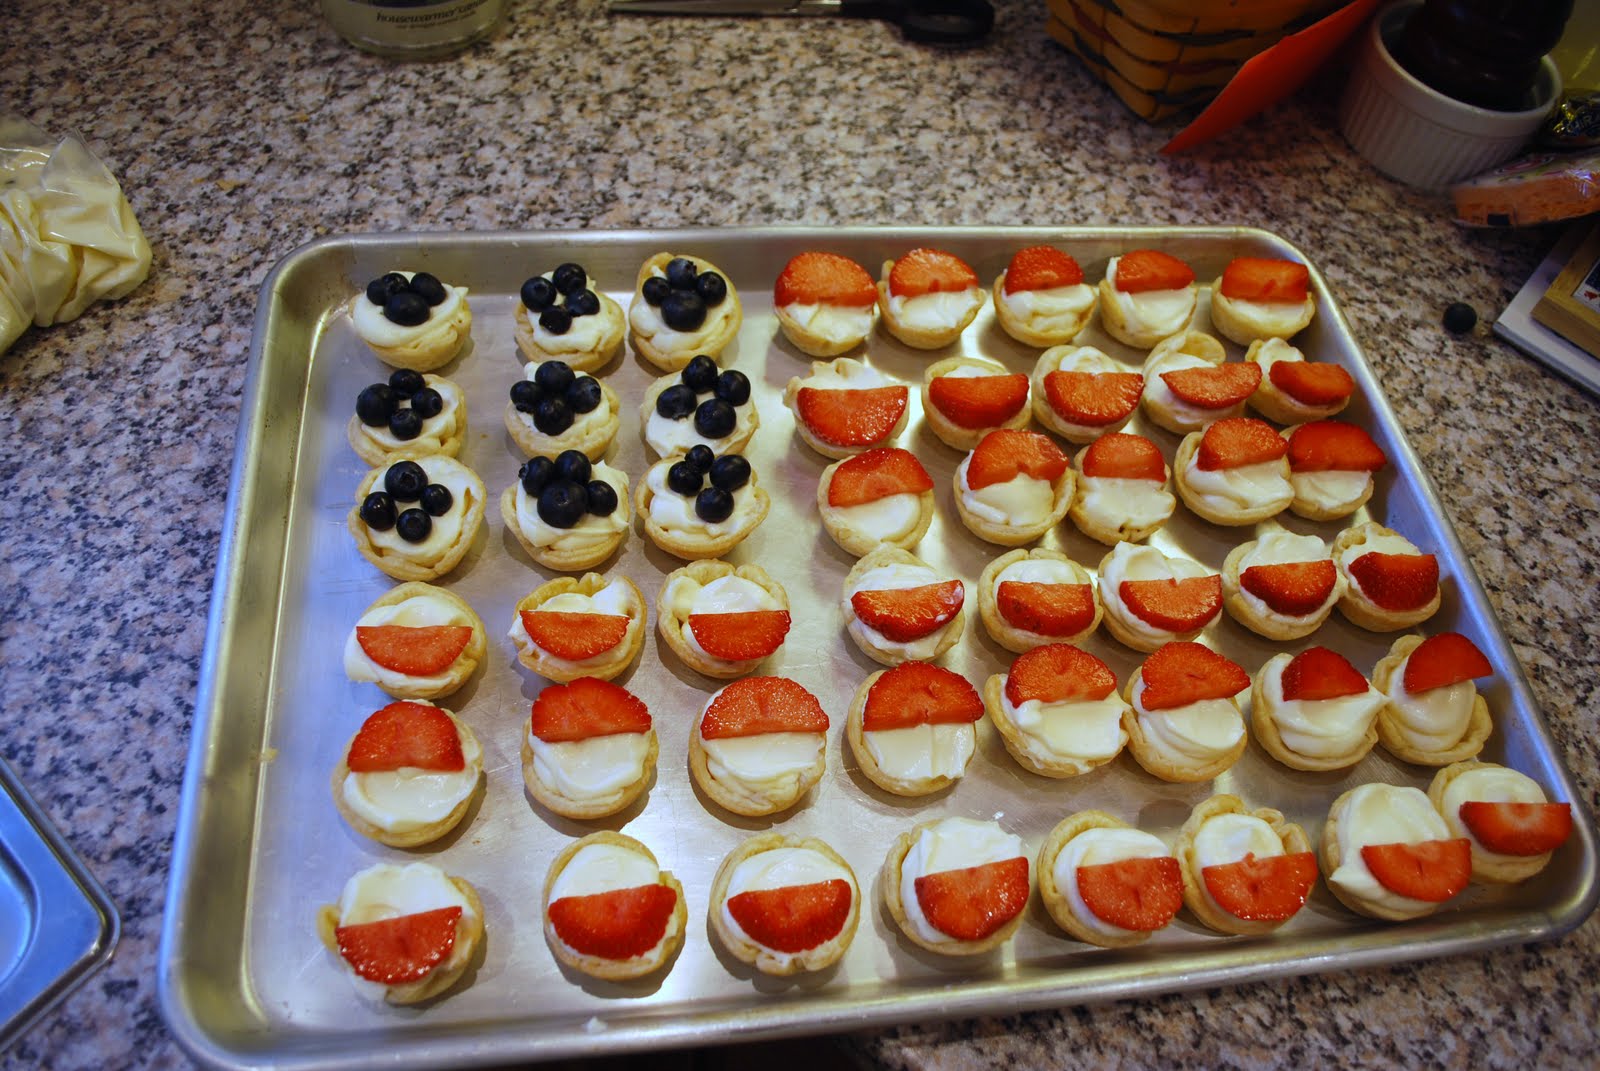
♥ You can bake desserts up to 3 days ahead of time. Depending upon the items being made is how you will have to store them.

♥ Prep that green garden salad a day ahead. Ziploc plastic bags are great for this! All those great veggies can be cut and ready to go at a moments notice. Heck you can do this while watching TV.

♥ You can prep veggies up to 2 days in advance- store in plastic containers in fridge.

♥ You can make things like mashed potatoes and home made rolls a day ahead of time. Heat them up either in the microwave or in the oven for a few minutes. How many of us have burnt the rolls because we were busy attending to "other items" ? Seriously, bake them in advance when you aren't stressing about your guests being comfortable and the food all making it to the finish line (the dinner table) at the same time.

♥ While the turkey is in the oven, give the floor the last quick sweep or mop (depending upon how messy of a cook you are you may have to do both) before the guests arrive.

Easy Clean Up after the meal

Those same plastic containers work great for soaking flatware and serving utensils. No stuck on food particles for you this year! Put a few drops of dish washing liquid and fill with hot water and there you are!

♥ Rinse the dinner dishes and stack them on a cookie/baking sheet. Keeping them in stacks makes for easy loading of the dishwasher or hand washing.

♥ Do this same thing for the used glassware. Use a paper towel to wipe off lipstick marks.

♥ Those plastic containers are great for storing those leftovers. Be sure to get them tucked into those containers as soon as dinner is over to prevent salmonella.

♥ Soak as many dishes as possible. You may find that you will need to run the dishwasher 2 or even 3 times to get through everything. That's okay, that's why you rinsed and stacked the dishes- having them organized like that makes them quick and easy to load in the dishwasher.

♥ Now grab yourself a glass of wine and get in there with your family and friends and enjoy the evening!

September 20, 2010

Sandie's Cottage Pie

Being that I currently reside in England, I like to try new to me dishes. I do like experiment with the local cuisine but I also like to revise how it's made and turn it into something that "I" would serve to my family and friends. I can't wrap my head around eating Lamb- to me they're just too cute and frisky to think about eating them. Besides, I prefer to wear their wool in the shape of hats, mittens, scarves and sweaters!

So first off I bet that you're wondering what's the difference between Shepherds Pie and Cottage Pie right? It's the meat! Shepherds pie is made from minced lamb or mutton (that's meat from an adult sheep). There are subtle variations on the ingredients and I came up with my own version of a Cottage Pie which is pretty darn tasty if I do say so myself. Oh I should mention that I like loads of veggies

Stuff you're going to need-
Potatoes- about 2½ pounds
1 cup milk or half and half
grated cheddar cheese 2 cups (I use white cheddar)
3 cups carrot-diced
1 large onion-diced
2 cups celery diced
1½ pounds of ground/minced beef,chicken or turkey and yes you can even used those vegetarian crumbles-although this really isn't a vegetarian kind of dish
2 tablespoons tomato paste
1 Tablespoon olive oil
1 Tablespoon Worcestershire sauce
½ teaspoon grated orange peel
2 cups hot water
2 Knorr Beef Stock Pot (these are little tubs) OR you can use 2 cups of Swanson's Beef Stock
add salt and pepper to your own personal tastes. I only add pepper as the beef stock will add plenty of flavor.

What to do with those things above...

Earlier in the day grab a fork and poke holes all over in all of those spuds! Put them straight on the rack into a preheated 350º oven for 1½ hours.

Use a very large skillet and place your 1 Tablespoon of Olive Oil in pan, place carrots in pan and saute for 5 minutes, next add celery and onion cook another 4 to 5 minutes. Next add in your ground/minced meat, cook until browned. Add in your hot water, your 2 Knorr BEEF Stock tubs, the 1 Tablespoon of Worcestershire sauce, the 2 Tablespoons of Tomato Paste and the ½ teaspoon of grated orange peel. Let simmer for 15 to 20 minutes so the flavors incorporate. Now if the sauce is not think enough just do the cornstarch thing...read the box it will tell you 1 tablespoon cornstarch to 1 tablespoon cold water. make sure it's all dissolved BEFORE adding in to the pot or you will have cornstarch lumps.

So, you've baked those potatoes earlier, time to peel them and mash them up. Add in your salt and pepper, your milk (or half and half), mix in the grated cheddar cheese. Now set aside.

Your cottage pie is ready to be assembled you can do this a few different ways but which ever way you choose make sure that the dishes you choose are oven proof.
I've done all of the following;
♥ individual bowls
♥ a deep dish ceramic pie plate
♥ a 9x13 ceramic casserole (lasagna dish)


Put the fillings in your bake-ware of choice, do not fill all the way. Place potato cheese mixture on top (this is your crust). Bake at 350º oven for about 20 minutes or until the cheese in the potatoes is melted and the peeks of the potatoes are browned.

♥Today decided that I would make a double batch as I wanted to bring a meal to a family whose military member is Tdy. This is a great dish to make for large families, potluck events or just for you and your hubby. I have more "pie filling" in my stock pot and am going to freeze it for use at a later time.


NOTE- filling will be HOT!

September 11, 2010

Sunny's Quesadilla Casserole

Another yummy dish from our "Mexican" themed cooking club dinner. There was not a single item that was not delicious last night! I can see myself making every dish that was brought to cooking club be it just for my family or for when we have friends over for dinner. Try one or two of all of these recipes if you're looking for something new and exciting to try!

Sunny's Quesadilla Casserole

1 lb. ground beef

1/2 cup chopped onion

2 cans ( 8 oz. each) tomato sauce

1 can (15 oz.) black beans, drained and rinsed

1 can (8 3/4 oz.) whole kernel corn, undrained

1 can (4 1/2 oz.) chopped green chilies, undrained

2 tsp. chili powder

1 tsp ground cumin

1 tsp. minced garlic

1/2 tsp oregano leaves

1/2 tsp crushed red pepper (optional)

6 flour tortillas (8-in)

2 cups shredded cheddar cheese

Directions
1. Brown beef and onion in large skillet on medium-high heat; drain. Add tomato sauce, beans, corn and green chilies; mix well. Stir in all of the spices except red pepper. Bring to boil. Reduce heat to low; simmer 5 minutes. Add red pepper to taste, if desired.

2. Spread 1/2 cup of the beef mixture on bottom of 13x9x2-inch dish sprayed with no-stick cooking spray. Top with 3 of the tortillas, overlapping as needed. Layer with 1/2 of the remaining beef mixture and 1/2 of the cheese. Repeat with remaining tortillas, beef mixture and cheese.

3. Bake in a preheated 350 F oven 15 minutes or until heated through. Let stand 5 minutes before serving.

Sopapilla Cheesecake- by Alisha

I got to taste this delicious little treat last night at our cooking club event.

Sopapilla Cheesecake


Ingredients
1 8 oz package cream cheese 1 stick melted butter
1 4 oz cream cheese 1/2 cup white sugar
1 1/2cup white sugar 1 ½ tsp ground cinnamon
1 1/2 tsp vanilla extract
2 packs refrigerated crescent rolls

1. Preheat oven to 350 F. Prepare a 9x13 in baking dish with cooking spray.
2. Beat cream cheese with 1 1/2 cup sugar and the vanilla extract in a bowl until smooth; set aside
3. Unroll the cans of crescent roll dough, and use a rolling pin to shape each sheet into 9x13 rectangles. Press into the buttered dish. Evenly spread the cream cheese mixture into dish, then cover with the remaining piece of dough and brush w/melted butter. Stir together the remaining sugar and 1 ½ tsp cinnamon in a small bowl and sprinkle evenly over the top of the cheesecake.
4. Bake in the preheated oven until the crescent dough has puffed and turned golden brown (about 30 minutes). Allow to cool 10 minutes before serving

September 10, 2010

Sandie's Chicken Tortilla Soup


After looking at literally dozens of tortilla soup recipes and not seeing one that jumped out at me I've decided to make up my own recipe. I knew what ingredients that I wanted in my soup and well tonight is perfect because I'm test driving this recipe on our neighborhood cooking group. Keep in mind that I'm making soup for 15 people and I'm sure that you can cut down this recipe


Sandie's Chicken Tortilla Soup-


Ingredients;

4 - 14½ ounce cans reduced sodium chicken broth

6 to 8 -cooked chicken breasts chopped (add or minus if- if you like lots of chicken use 8, like a little use less)

2 -15 ounce cans diced tomatoes

2-14 ounce cans dark red kidney beans (rinse the beans in cold water)

2- 14½ ounce cans black beans (rinse the beans in cold water)

3- medium sized yellow bell peppers -diced

3 medium sized green bell peppers-diced

3-red peppers (medium heat)-seeded and diced

4-green peppers (medium heat)- seeded and diced

2 cups yellow onion - diced

2 cups frozen yellow corn

2 to 3 teaspoons ground cumin (add or minus to your personal taste)

½ teaspoon dried jalapeno flakes (or add a fresh diced jalapeno if you wish)


Toppings...

Sour cream

Chopped Scallions (green onions)

Shredded Mexi-blend cheese (monterey jack, cheddar, asiago)

Fresh chopped Cilantro or as they call it here in the UK Coriander

Diced Avocado (squirt with lemon or lime juice to keep it from turning brown)

Sour Cream and for my British friends you can use Creme Fraiche

Lime Wedges

Tortilla Chips


Cooking Instructions (can't get by without these)...


Cook your chicken breasts, let cool dice and set aside.


Saute diced onions and diced bell peppers in 1 to 2 teaspoons of olive oil until bell peppers are soft and onions are transparent. Add chicken broth, canned tomatoes, canned beans and those diced medium heat peppers. don't forget to wear gloves when handling hot peppers and what ever you do DON'T touch your nose or eyes!!! Add in your ground cumin and let simmer. Taste it, if you like it spicy add more of the spicy peppers and cumin, don't like it too spicy, use less.


Add chicken and corn shortly before serving or else they will turn to mush.


Top with your favorite toppings (see above list for ideas) and the tortilla chips are a must! Don't forget to have an icy cold Corona Beer with it!

July 24, 2010

"No person in the world has more courage than the one who can stop after eating one peanut."

-Channing Pollock

July 23, 2010

Chicken Breast wrapped in Streaky Bacon

preheat oven to 350º


I used boneless skinless chicken breasts that were all trimmed up. Season with salt and pepper then wrapped with thick cut Bacon (for my British friends this is thick slice streaky bacon). I used 2 of 3 slices of bacon, wrapped all the way around the chicken breast. I did drizzle a little bit of olive oil on the bake pan but to be honest the fat from the bacon will make it not stick to the baking sheet.
Cook for about 40 minutes or until the chicken is cooked thoroughly and the bacon is crispy. Believe it or not but the chicken was remarkably moist- even after cooking so long.


*side note- I'm going to experiment with temperature and time and see if I can get the same results at a higher temperature with a shorter cooking time. Might have to solicit some friends to try this one on as my family gets rather tired of me cooking the same things over and over again trying to get a recipe down pat.

July 22, 2010

One must ask children and birds how cherries and strawberries taste.
-Johann Wolfgang von Goethe

July 5, 2010

Fruit Tart Flag


I'm always striving to make something "different" when having friends over for a social gathering. I've been getting recipe e-mails from Food Network for what seems to be for forever and once I saw this one for the Flag Fruit Tart Well I knew that I was going to make it for our son's graduation party.


I changed a few things from the recipe on Food Network- for one, there's no place (to my knowledge) to buy those mini tart shells so I had to make my own. I bought 2 boxes of those Pillsbury pre-made pie crust (you'll need 3 packages), rolled the crusts out and used a 2½ inch circle cookie cutter and cut 48 of those pie dough circles- which worked great in my Wilton mini tart/mini muffin pan. I baked them @ 350º for 10 minutes. Don't forget to use a folk and poke vent holes for the steam. The mini tart shells popped right out too! Let them cool on a wire rack. The shells can also be made a day or two in advance.


I added in a ½ cup of granulated sugar and a teaspoon of Vanilla, I used whipped cream from a can (use what you have on hand in my motto). The reason I added more sugar is that British version of whipped cream in a can is not sweet as it is back in the USA.


Now for putting it together...I put my mascarpone mixture into a gallon size ziplock bad, snipped of an end and used it as a pastry bag. Unless you do a lot of cake decorating, pastry bags aren't something most folks have "on hand". Squeeze into each little tart shell, smooth over with a frosting knife (a butter knife will do well too). Place your berries and berry slices as the picture shows and there it is!

June 25, 2010

You don't have to cook fancy or complicated masterpieces - just good food from fresh ingredients.
-Julia Child (1912 - 2004)

June 24, 2010

The first law of dietetics seems to be if it tastes good, its bad for you."
-Isaac Asimov

June 22, 2010

Chick Food Chicken Salad

THIS is the chicken salad recipe that I made for my girlfriends on our trip to Stoke-on-Trent. I call it's My Chick Food Chicken Salad because of the grapes and cashews. I find that men don't enjoy fruit in their salads...then my husband surprised me and told m,e how much he enjoyed it. Then he really surprised me with his request that I make this for other occasions.

Side note- I like to take short cuts where I can, especially when it comes to food preparation. It's even better when they save you time and money!

Things you need:
  • 2 Whole Roasted Chickens from the grocery store- meat plucked off the bone and shredded! Don't worry about the seasoning of said roasted chickens, it doesn't matter (sweet huh)
  • 2 cups seedless grapes- Black or Red, I personally prefer Black grapes because of their sweetness and firm texture but either one of these are fine. BEWARE-Green grapes are too tart for this recipe.
  • Cashews- chopped (this will be the topping for the salad)
  • 2 cups chopped celery
  • 1 Tablespoon lemon juice
  • ½ cup sour cream or creme fraiche
  • ¾ cup mayonnaise
Lets get cooking!
All of your cooking is done because you bought those lovely roasted chickens from the grocery store! Simply pluck the meat off of the chicken and shred! Slice grapes into halves or quarter them if they are large. Chop the celery but not too fine. Mix All 3 together in large bowl. Mix the lemon juice, sour cream and mayonnaise together, pour over chicken mixture in bowl and toss. I've not added any salt to this what so ever, if you feel that it needs some salt add only at the very end . I like to use the salted cashews as a sprinkled on topping, they add a great crunch factor and just the right amount of salt to this recipe. Serve it on croissants or on Bibb Leaf lettuce leaves (also called Boston or Butter Leaf lettuce). It's perfect for baby showers, bridal showers, church socials, coffees and luncheons.

Baked Potato Soup

One of my favorite simple meals is making stuffed baked potatoes for dinner. Potatoes can be used in so many ways and here's a great recipe to get that great baked potato meal in a soup- enjoy!

Here's the list of goodies you'll need:
  • ½ pound bacon cut into small pieces
  • 1 medium sized onion chopped
  • 1 small shallot chopped fine
  • 3 cloves garlic put through a garlic press
  • 3 Tablespoons flour (the all purpose type)
  • ½ teaspoon pepper
  • 1 teaspoon dried basil
  • 3 cups low sodium chicken broth
  • 2 very large baking potatoes - baked, peeled and cubed
  • 1 cup half and half cream
  • shredded cheddar cheese
Now to cook it up:
In a large saucepan- cook bacon until crisps, drain, reserving 1 T. of drippings. Set bacon aside. Saute the chopped onion and shallot in the bacon drippings until tender. Stir in the flour, salt (to your own liking) basil and pepper; mix well. Gradually add in the broth stir so you won't have lumps in your soup. Bring to a boil; boil for 2 minutes. Add potatoes and cream, heat thoroughly but no not boil. Garnish with bacon and cheese.
Serve this with a small garden salad and some crusty french bread and make an apple crisp for dessert...m'm!

June 21, 2010

Popovers

This recipe is one of my favorites from my childhood. I've been baking these since I was 11 years old. I never let my mom make them for me, this was my special treat that I would make all on my own.

Things you will need are...

popover tins- although muffin tins will work too.

  • 1cup flour (the all purpose kind)
  • ½teaspoon salt (I use kosher salt for all of my baking and cooking)
  • ¾ cup milk
  • 2 Tablespoons honey
  • 1 Tablespoon melted butter (I use unsalted butter in all of my recipes)
  • 2 large eggs- beaten
Preheat oven to 425º this recipe makes between 8 to 12 popovers.
Coat the popover/muffin tins with butter, set aside. Mix flour and salt together. Add milk, honey and melted butter, mix well. Add in beaten eggs, mix well.
Fill each popover tin to just under half full. Bake 25 to 30 minutes OR until the popovers are golden brown. Do not open the oven door to peek- turn on the oven light and look through the window instead... or your popovers will fall and not rise again :-(
Serve hot with with honey and butter, YUM!

Pasta e Fagioli

This soup recipe is my Hannah's favorite soup ever! There are days when I know that my girl will come home from school simply exhausted. There's nothing like a pick me up of this Italian classic with a couple of slices of garlic bread to pick her back up!

you'll need...

  • 2 large sprigs fresh Rosemary
  • a good sized bunch of fresh Thyme
  • 1 large red onion finely chopped
  • 2 (14½) can red kidney beans
  • about 3 ounces of Pancetta chopped
  • 5 to 6 cups of low sodium chicken broth
  • Black pepper to taste
  • rind of Parmesan Cheese
  • 1 cup elbow macaroni


Let's make some soup!

I like to put my rosemary and thyme in a sachet bag (can be bought in any cooking store or in your grocers kitchen utensil section). If they don't have it then place in some cheesecloth and tie up with some cooking string.

Heat the olive oil and butter and saute the onions until translucent, add in the pancetta and cook until crisp.
Next add in the chicken broth and kidney beans, add in the sachet of fresh herbs and your cheese rind. Put lid on pot, bring to a boil then bring down to a low simmer for about 10 minutes.
While soup is cooking I like to make my pasta separately- boil the elbow macaroni until al dente. Put pasta in bowls then ladle the soup over the pasta. Sprinkle with some fresh grated Parmigiano Reggiano and if you like, drizzle a little olive oil on top just before serving.

Serve with a side salad of fresh greens and a couple of slices of hot crusty garlic bread. What a wonderful meal on a cold or blustery day!


Something that I do for myself

I copied this in whole from my "scrapbooking" blog because as I see it, it's about dishes and pottery and it should have been posted here instead of there, enjoy the read!

I see it as being rather funny how so many of women friends save their China for that "special occasion". I have many friends who either have it and don't use it or they use it only once a year for Christmas dinner. Maybe this is an American thing- being that I don't have all that many British friends and the ones I do have, well they think I'm a nutter with all of my pottery (and that's okay so do my American girlfriends -and I still adore them all).

My thing is this...make YOU a priority. You're someone special aren't you? The next time you make yourself some tea and lunch- serve it up on that lovely china you that you've been saving for that "special occassion".

Quiche-any way you like it!

This is my no fail make it for brunch, lunch or when ever I want something that is easy and will make a good impression on new friends recipe. You can do this a few different ways with the crust...
  • buy a box of pre-made pie crust
  • buy the frozen pie crust in the pie tin
  • or make your own pie crust from scratch

you will need the following items;

  • 4 jumbo eggs
  • 1¼ cups heavy cream
  • 1 small onion diced
  • ¼ to ½ cup of cooked crumbled bacon
  • 5 ounce bag of shredded Swiss Cheese
  • 2 Tablespoons of butter
  • salt and pepper to taste

I use pre made pie crusts and will be giving directions for them...

Pierce crust with fork all over...lots and lots of times as this will let the steam out when baking. I also covers with aluminum foil and fill the pie (over the aluminum foil) with beans to keep the crust from rising up. After 10 minutes remove from oven, take out aluminum foil and bake until golden, could be as little as 6 minutes or more than 10 depending upon your oven. Set aside.

Saute onions in butter until transparent. Beat eggs and cream together, add salt and pepper. Place the cooked onion and crumbled bacon on bottom of pie crust, even spread the shred Swiss cheese over the top. Pour egg and cream mixture over the top. Bake at 375º for 30 to 40 minutes or until quiche is set and is no longer jiggly and can be cut cleanly with a knife.

There's no hard set rule as to what you can and can't put in a quiche. Omit the onions if you don't like them, try various things such as asparagus, mushrooms, ham or broccoli. Just remember to have the items precooked and drained before putting into you quiche!

I use a deep dish ceramic pie plate -mine is by Home Laughlin China Company- better know for it's #1 selling line Fiesta dinnerware...I simply love to bake in it! Now if you use the frozen pie crusts that are already in a pie tin you will need to divide the ingredients as those pie tins are quite shallow and this recipe will make 2 quiches in a shallow pie dish. The pie plate from Portmeirion will also do very nicely- although I've only used mine to make cottage pie- but that's another recipe story ;-)

Scones

This is my tried and true recipe, I've been making scones from this recipe for about 16 years now. Got it from a girlfriend when we were stationed at Dyess AFB, Texas.

  • 2 cups flour
  • 2 teaspoons baking powder
  • 1Tablespoon sugar
  • 6 Tablespoons butter (slightly softened-do not put in microwave)
  • 2 eggs well beaten
  • ½ heavy cream
  • ½ teaspoon salt (I used kosher salt for all of my baking)
  • ½ teaspoon Vanilla
Mix dry ingredients well, work in butter with a pastry knife. Add in wet ingredients making sure that eggs are well beaten before adding. Stir until well blended. Dust kneading area with flour, kneed on cold surface for one minute. Roll out to ¾ inch thick, cut into wedges or use round cookie cutter for a more neat appearance. Here I used a 2½ inch round cookie cutter.
Heat oven to 400º, Bake on baking stone for 8 to 10 minutes until golden.
Cooking times do vary in different ovens. I've moved several times over the years and every oven has it's little differences.

You can serve these fresh right out of the oven with butter (this is how my children like them) or the way they serve them here in England- cold with clotted cream and strawberry or raspberry jam. Either way they are a tasty treat!


Chili Corn Bread Salad

Chili Corn Bread Salad
From the Kitchen of Alisha C.

1 pkg. (8 and ½ ounces) corn bread muffin mix
1 can (4 oz.) chopped green chilies
1/8 tsp. cumin
1/8 tsp. oregano
Pinch sage
1 cup mayo
1 cup sour cream
1 envelope ranch dressing mix
2 cans pinto beans, drained and rinsed
2 cans whole kernel corn, drained
3 medium tomatoes, chopped
1 cup chopped green pepper
1 cup green onions, chopped
10 slices cooked bacon, crumbled
2 cups shredded cheddar cheese

Prepare corn bread according to package directions. Add green chilies, undrained, cumin, oregano, and sage. Bake in greased 8-in. pan at 400 degrees for 20 -25 min. Let cool. In a small bowl, mix mayo, sour cream and dressing mix. Set aside. Crumble half of cornbread in a 9X13 pan. Layer with half of beans, mayo mixture, corn, tomatoes, green peppers, green onions, bacon and cheese. Repeat layers (dish will be very full). Cover and refrigerate for 2 hours. Makes 12 servings.

June 19, 2010

Beef and Ale Pie- revised!

There's a running joke about the food here in England...it's served piping hot so you'll burn your tongue so you won't know that it's bland. That's simply NOT true! Sure they serve the food scalding hot but that's just the way they cook out here. Now as for flavor... I find that it depends upon what you go and what get. For myself, I like to have what's considered to be classic "Pub Food". You can't go wrong with this pub food classic- Beef and Ale Pie. I did some searching on the internet and with my knowledge of meats and veggies along with spices and the workings of my stove or "cooker" as it's called here in England I've come up with a rather nice Beef and Ale pie recipe of my own. Oh for my Friends back in the states, your Pyrex measuring cups should have the ml measurements.


So here's what I've come up with...
Butter- salt free
salt and pepper
Worcestershire sauce- just a dash
pre-made pie crust (I like Pillsbury but you could also make your own)
1½ pounds of lean beef (I used a lovely lean roast) cut it into cubes
2 med to large red onions- chopped
1 cup of a nice brown ale (I used Old Hooky)
1 400g can of diced tomatoes
26 ounces Swanson 33% less sodium Beef Stock
1½ to 1¾ lbs carrots- diced

½ to ¾ teaspoon of dried Grated Orange rind
3 Tbs cornstarch to thicken


Now lets get cooking!

Add some butter to a skillet and brown those beef bits! Do it in small batches or else you'll end up steaming your meas instead of browning them- salt and pepper your meats at this time. Place browned beef bits in a dish, saute the raw veggies, add the meats back in and add the canned tomatoes, ale, dash of worcestershire let reduce. Add in the beef stock and smimmer until the sauce reduces.
Use 1 Tablespoon cornstach to 2 Tablespoons COLD water, stir until there are no lumps and cornstach is well mixed,add in to meat mixture in pot stir until thickened. Place in pretty ceramic pie plate. Put a pie crust on top, cut some cute shape into the top of it (I usually make a heart) and bake in the oven until the top of the crust is golden brown. Follow directions on the pie crust to achieve desired effect. Remember your "pie filling" is already cooked.

This recipe makes enough for 4 people.

Tips from Sandie...
♥you can do a couple of different things to make a beautiful golden brown crust- brush crust with milk OR with a beaten egg, either one works well.
♥if you have oven proof bowls why not bake your beef and ale piein them! It's easy to bake individual servings that way! Just another reason why I love my Fiesta-ware!


**I've gone and revised the recipe for this dish- after having ate a few more pies in some various eating establishments and through trying various ingredients I've gone and changed up a few things. The secret ingredient in this recipe is the orange rind- it really helps to balance out the flavor (weird but true)

May 25, 2010

Curried Chicken Salad

This recipe comes from Carrie- the newest neighbor on our street. This was fresh and delightful!

Curried Chicken Salad:
3 chicken breasts
1 cup Mayo
1½ - 2 tablespoons curry powder
1 celery stalk finely chopped
4 green onions thinly sliced
¼ cup slivered almonds (can omit if nut allergy)
¾ cup seedless red grapes or cherries when available
Lettuce and pita pockets for serving

Parboil chicken. Let cool and chop or shred. In large bowl, combine the Mayo and curry powder. Add chicken, celery, green onions, and almonds. Stir until well combined. Just before serving add grapes or cherries. Serve over a bed of lettuce or in pita pockets. (I do both:)

Cooking Clubs

With the desire to get to know our neighbors better, Our Neighborhood started a cooking club. Although I was unable to attend the first 2 get togethers (first due to a prior engagement and 2nd due to being sick) I am a charter member. I can't begin to tell you all how much fun having something like this going on in your neighborhood. Pick a theme, I chose "salads" for mine and go from there. Sure it can be challenging for people to think outside of the box when it comes to salads but I think that we had a terrific show of "different" dishes. Salads are not just limited to "lettuce", there is so much more out there. That's what the cooking club is all about, trying new to you dishes without the expense of buying all of the ingredients. I dare say that all of the salads were delicious! From appetizers, to sides and main courses to desserts! As the recipes trickle in from the cooking club members I am compiling them. I will post them here look under "recipes" when you are looking for something "different" to try.

May 24, 2010

I'm getting a blog makeover!

My dear friend Terri is giving me a blog makeover. I hope that it will inspire me (and you) to get creative and get to writing up those recipes!

February 20, 2010

Birthday Cake


Birthday Cakes here at my house are a little different than the norm- I don't do cake decorating. I've tried my hand at it a few times and I never got the results I wanted from it. It's something that I will probably take a few classes on in the future in order to perfect the technique. But here's something I know how to do- it's baking cakes and making chocolate stuff to go with it! This is a Chocolate Truffle Cake and I dare say it is to die for! Happy Birthday to my husband!

February 8, 2010

Cheese - milk's leap toward immortality.
Clifton Fadiman

February 6, 2010

making Potato skins and Gnocchi

Have you ever wanted to make something with leftovers from another recipe? Well here's your chance!

The other day my daughter and I made potato skins as part of a pre-super bowl party of sorts for our single military Men and Women who live in the dorms. Well there's lots of left over "meat" of the potato and what better to make with it than...gnocchi!

So here goes...

Potato Skins

I bought a small bag of white potatoes at the local grocery store

preheat oven to 350º

wash potatoes, pierce all over with a fork, bake in the oven for 1 to 1½ hours. Place directly on oven rack.

Let cool at least one hour. Then cut potato into quarters length wise scooping out potato flesh and leaving about ¼ inch or there about of flesh on said potato skin. Place potato skin on a baking try brush lightly with cooking oil and cook at 425º for 8 minutes or until crispy. Take out of oven turn over fill with what ever you like. If you want traditional cheese and bacon 'tato skins...sprinkle with shredded cheese and cooked bacon bits put back into oven for3 to minutes or until melted. Top with sour cream and chopped scallions- and watch them disappear!


Now for the Gnocchi, hey you've got all of that let over potato that's just hanging around might as well use it right???

you'll need about 1 pound of your potato flesh- you can run it through a ricer or use a potato masher, mash it up well!
Season with some and pepper,
whisk 1 large egg mix into potato, add ½ cup of flour, use you hands to mix. Kneed the dough slightly not too much it will make a tough pasta. Roll into a 1 inch thick log and cut the dough into 1 inch pieces. Run the pieces over the tines of a fork (the grooves help the gnocchi to hold sauce). Drop into boiling water for about a minute (they will float when done). get them out quick or they WILL boil apart.

Top with your favorite pasta sauce- our sauce of course is Momma Sauce.